Appearance
Custom App
Overview
A custom app allows a developer to add features to your Shopify admin, access your store's data directly using Shopify's APIs, and extend your online store to another platform using the Storefront API.
The steps below are normally performed by Order Protection after you have accepted their collaborator request.
Enable custom app development
Before a custom app can be created, custom app development must be enabled in Shopify. Only the store owner, or staff with Enable app development permission, can enable custom app development.
Steps:
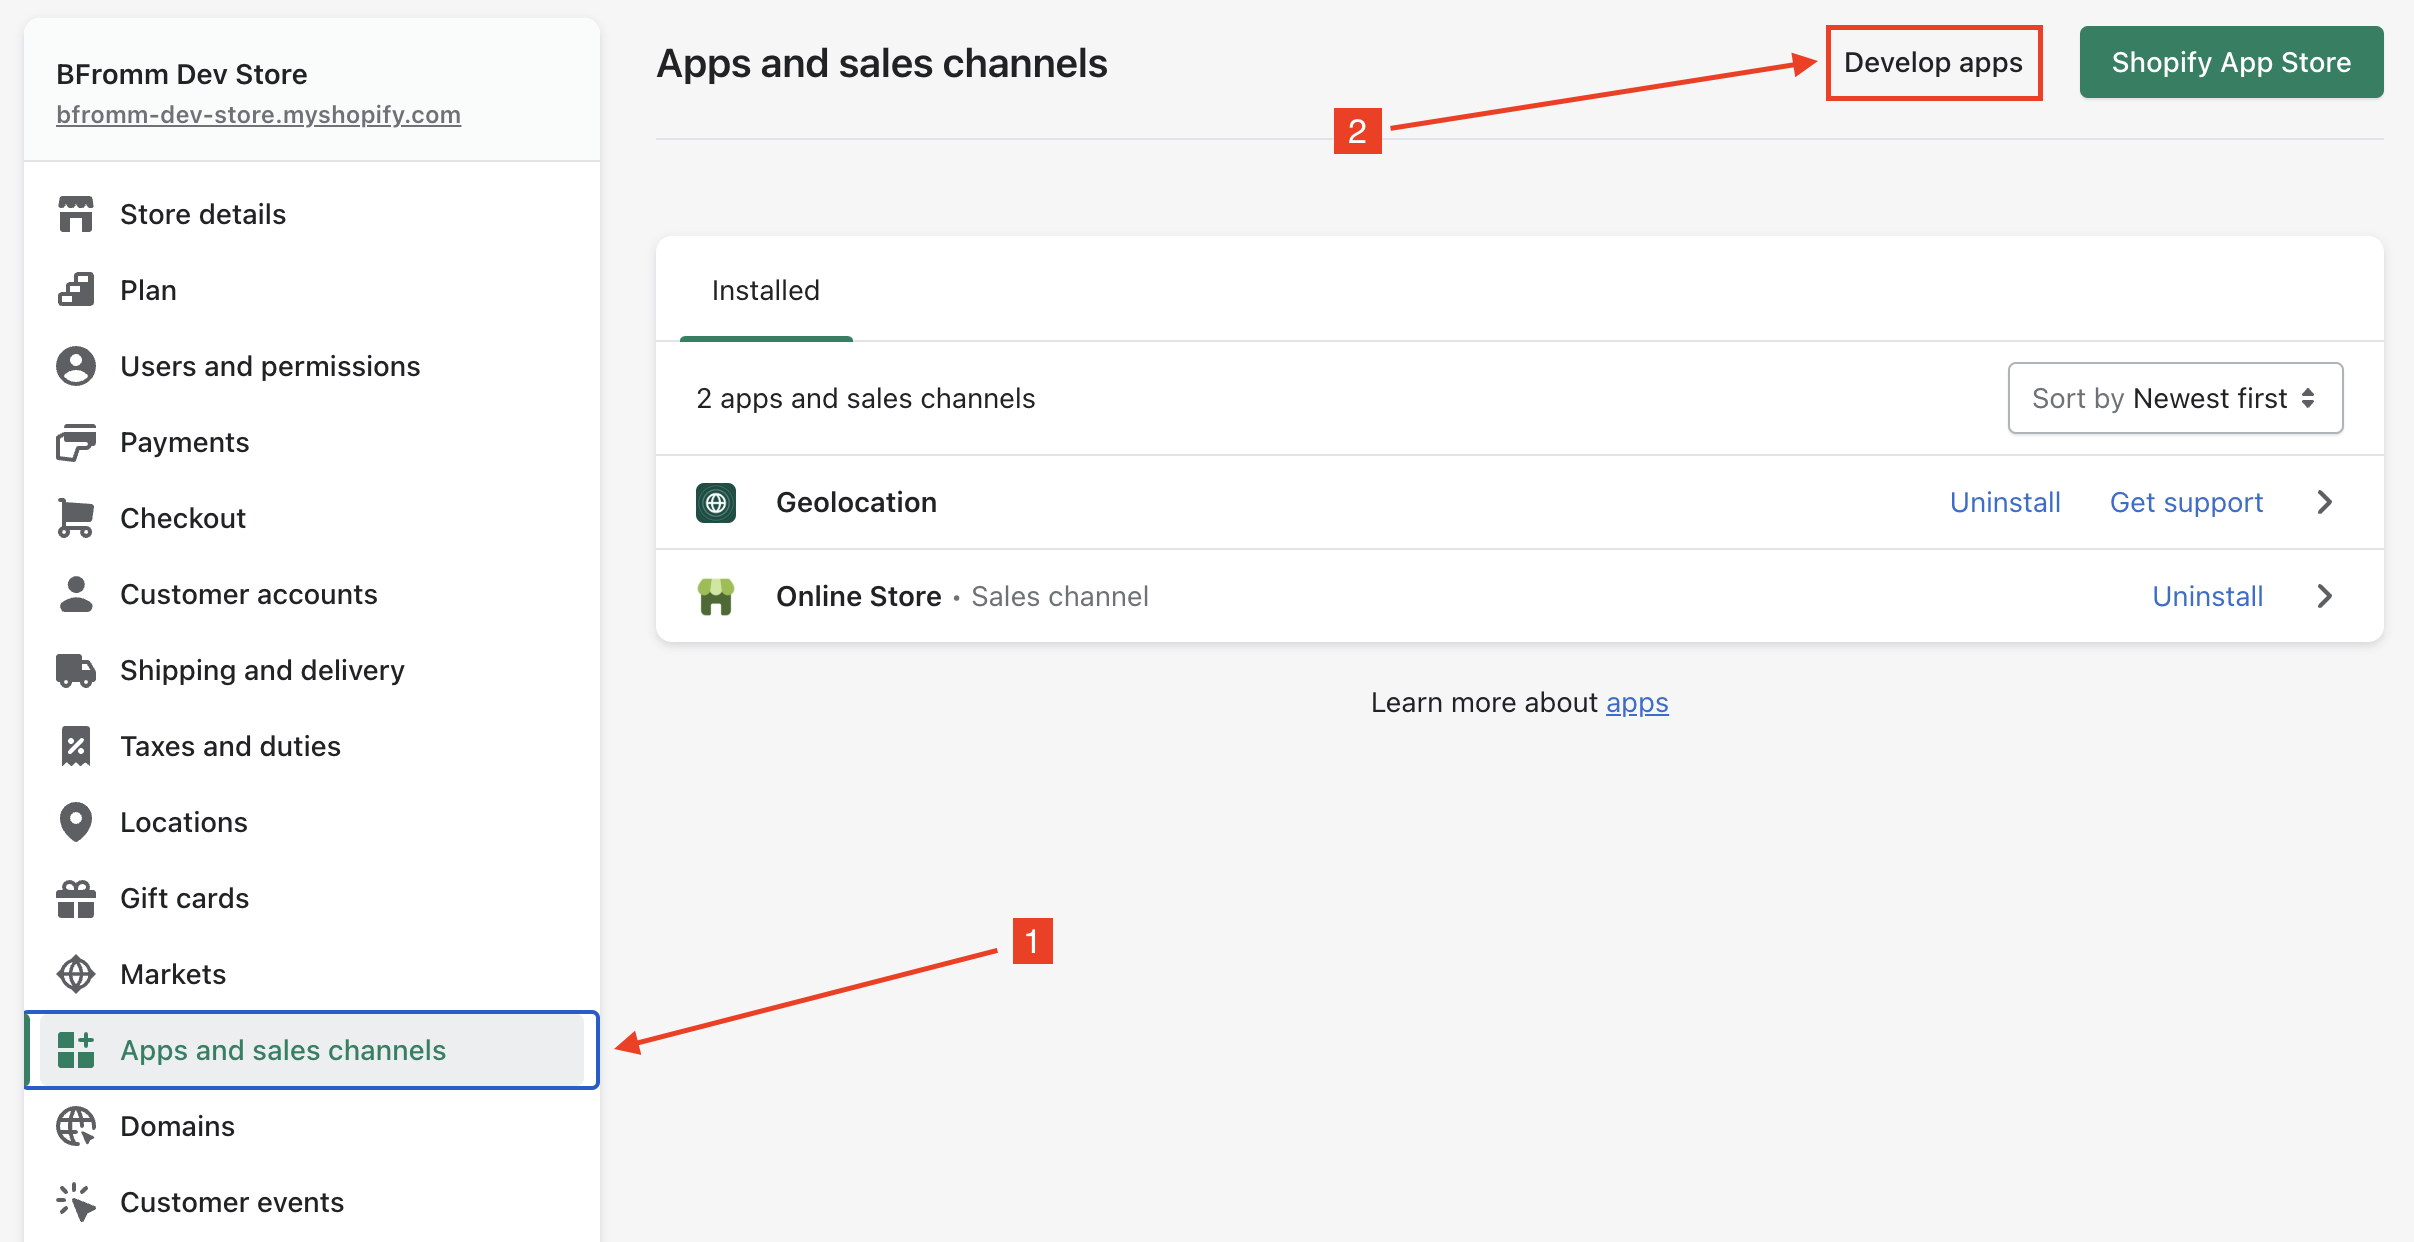
From your Shopify admin, click Settings > Apps and sales channels.
Click Develop apps.
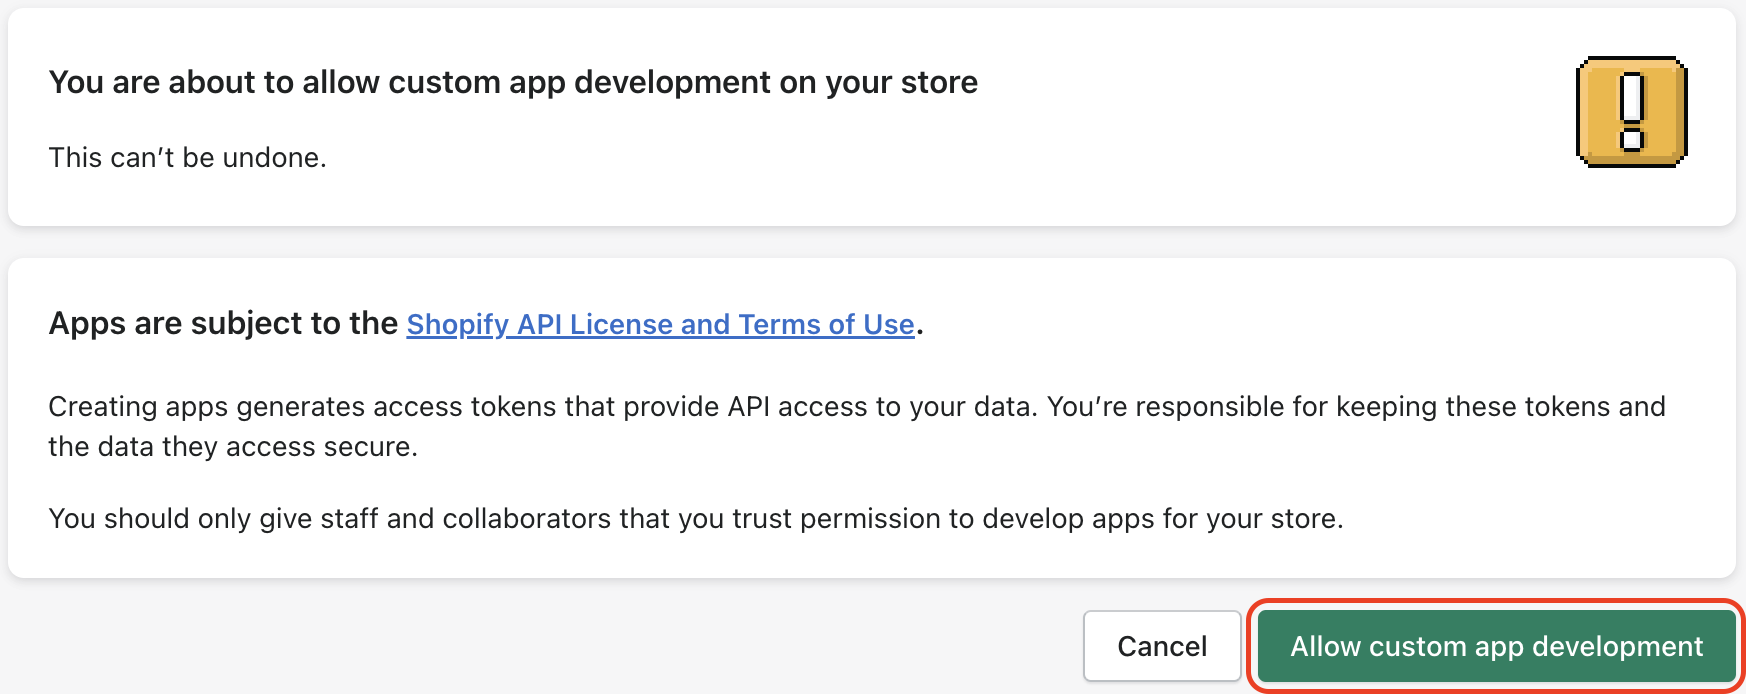
Click Allow custom app development.

Read the warning and information provided, and then click Allow custom app development.
Create the app
From your Shopify admin, click Settings > Apps and sales channels.
Click Develop apps.
Click Create an app.
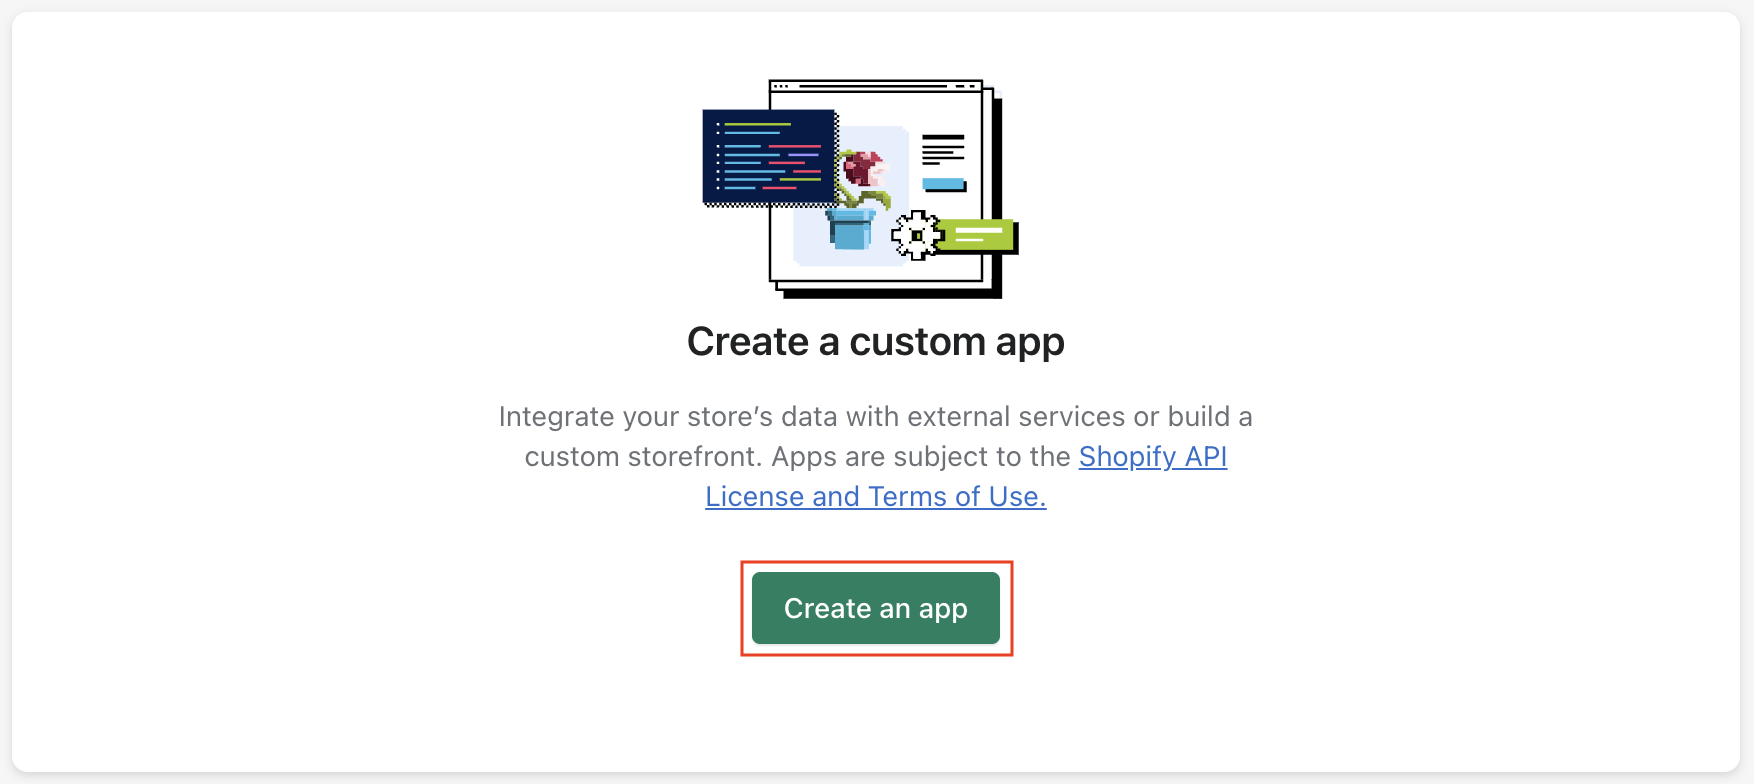
In the modal window, enter
OrderProtection.comfor the App name and selectOrderProtection.com (admin@orderprotection.com)for the App developer.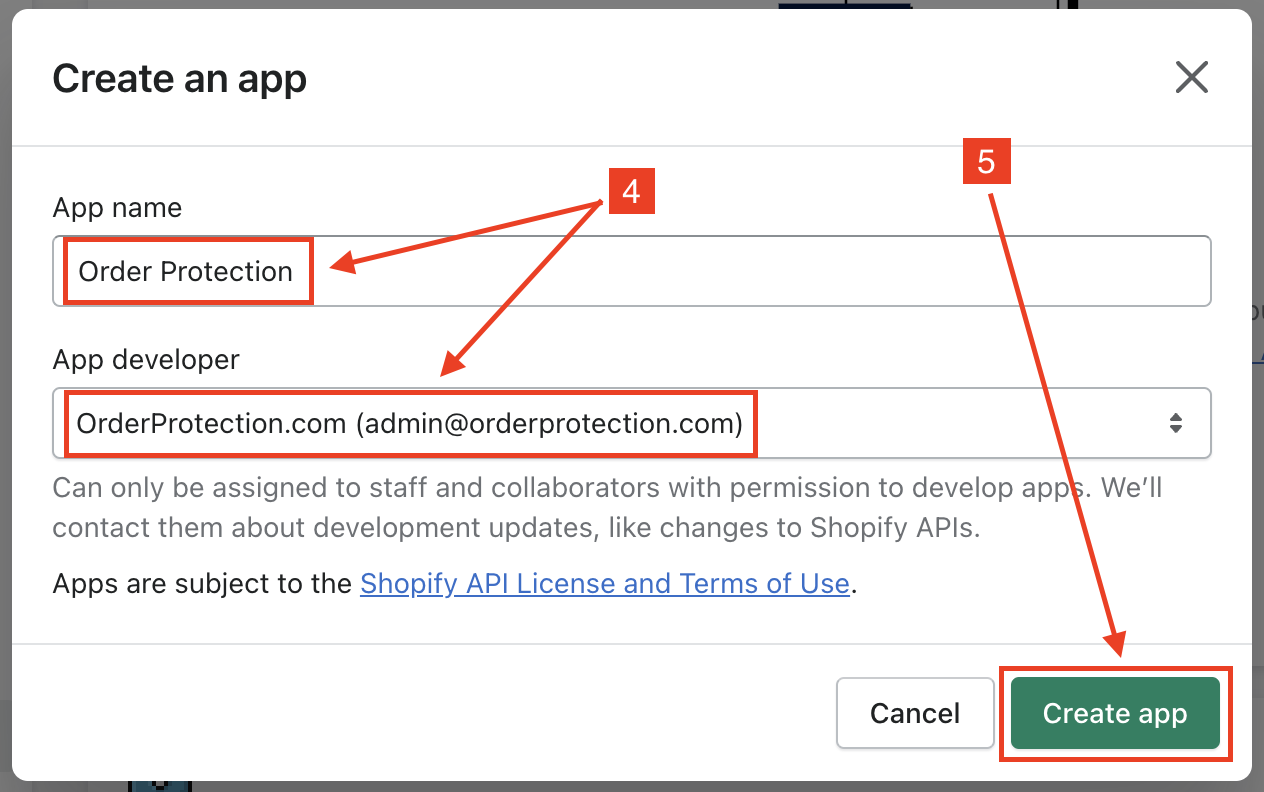
Click Create app.
Select API scopes
Now that you have created the custom app, you can assign API scopes to it.
From the
Overviewtab, click Configure Admin API scopes.In the Admin API access scopes section, select the following API scopes:
- Analytics
read_analytics
- Assigned fulfillment orders
write_assigned_fulfillment_ordersread_assigned_fulfillment_orders
- Customers
write_customersread_customers
- Discounts
write_discountsread_discounts
- Draft orders
write_draft_ordersread_draft_orders
- Fulfillment services
write_fulfillmentsread_fulfillments
- GDPR data requests
read_gdpr_data_request
- Merchant-managed fulfillment orders
write_merchant_managed_fulfillment_ordersread_merchant_managed_fulfillment_orders
- Order editing
write_order_editsread_order_edits
- Orders
write_ordersread_orders
- Products
write_productsread_products
- Reports
write_reportsread_reports
- Analytics
In the Webhook subscriptions section, select whichever version has
(Latest)in the name.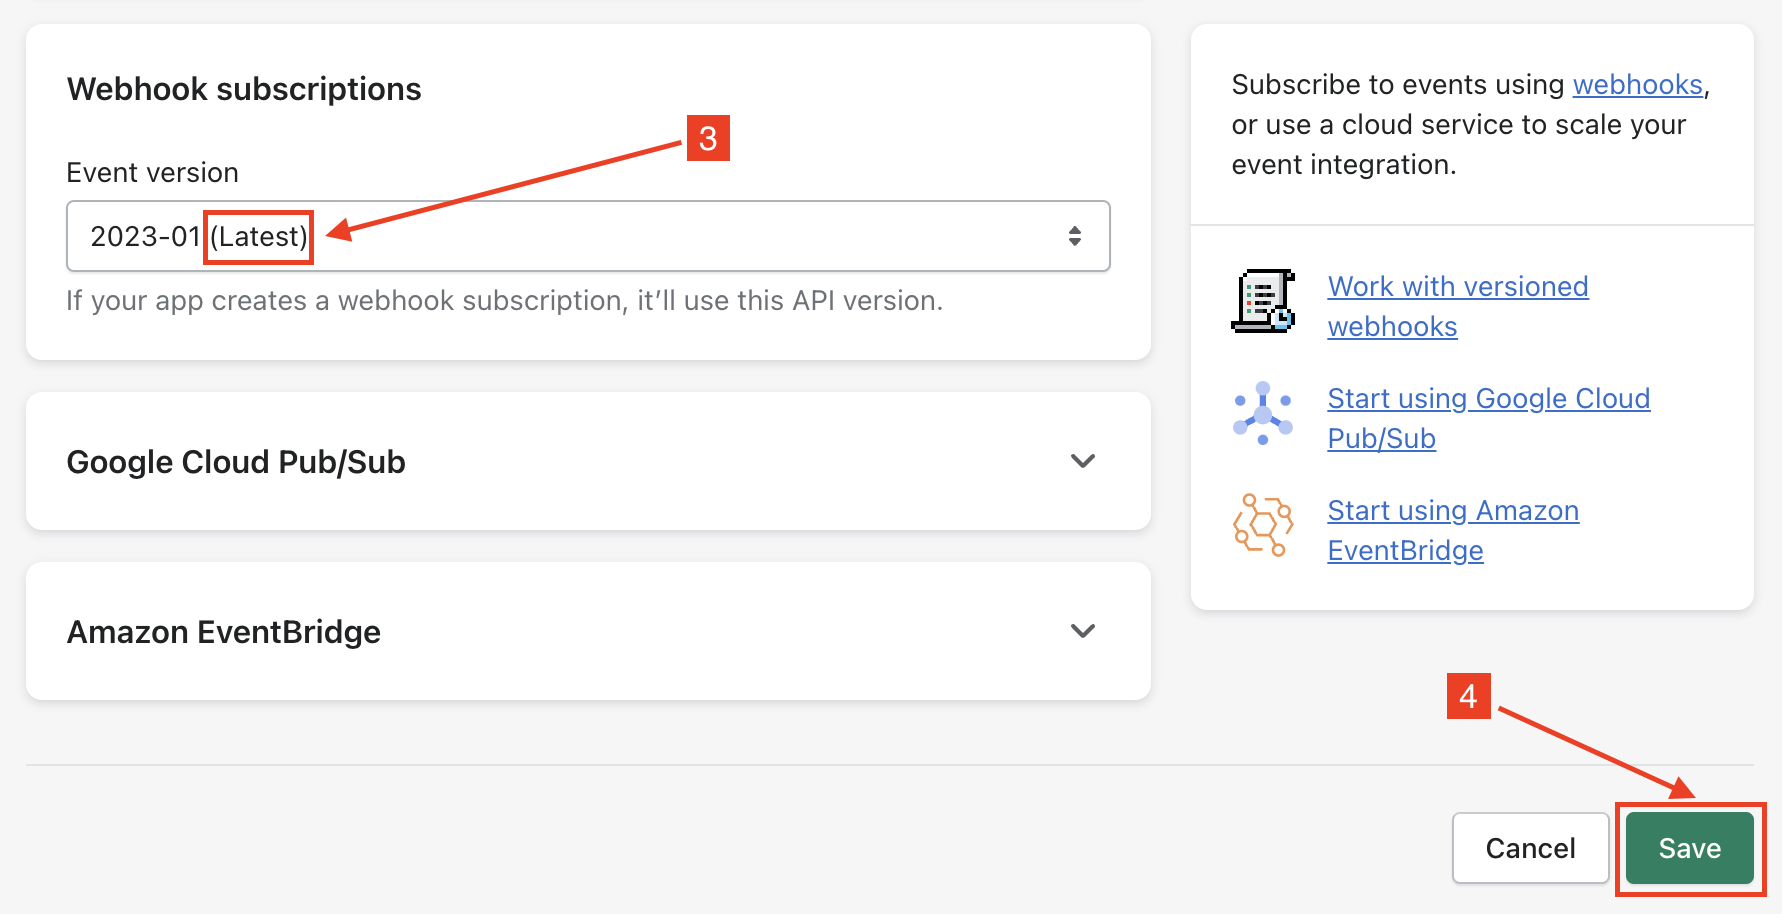
Click Save.
Install the app and get the API access tokens
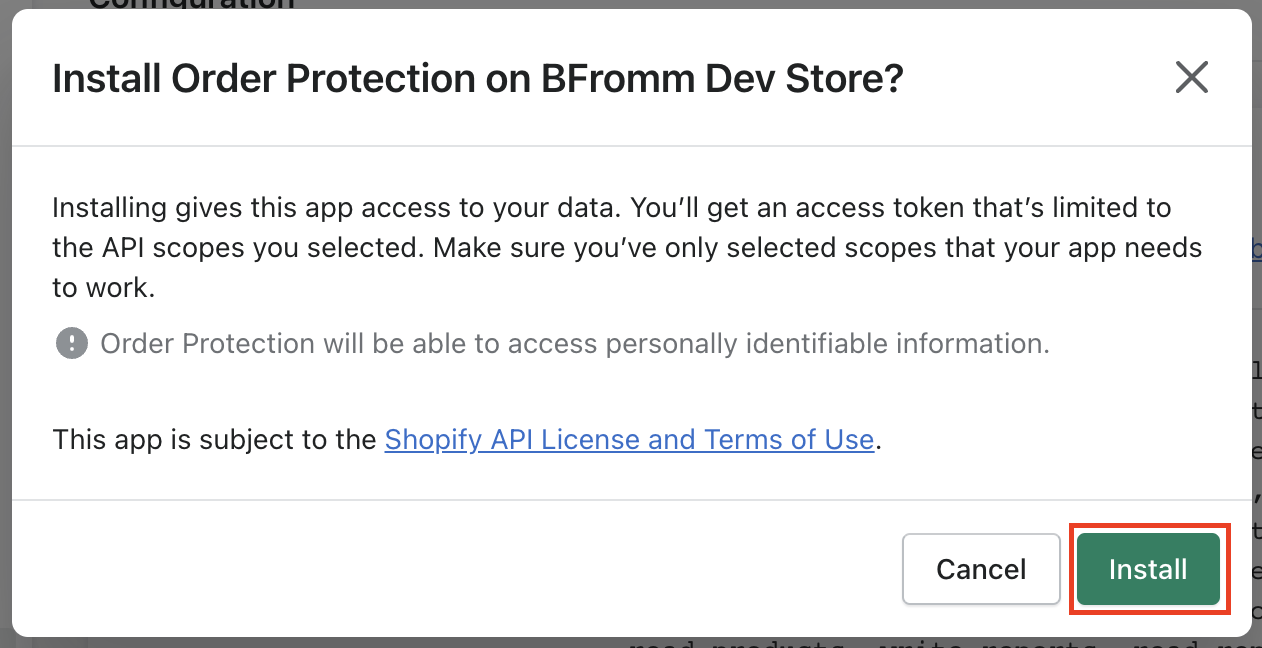
You are now ready to install the app. You'll get your API access tokens after you install. Depending on what API scopes you assigned to the app, you'll get an Admin API access token, a Storefront API access token, or both.
Confirm the
Admin API access scopesthen click Install app.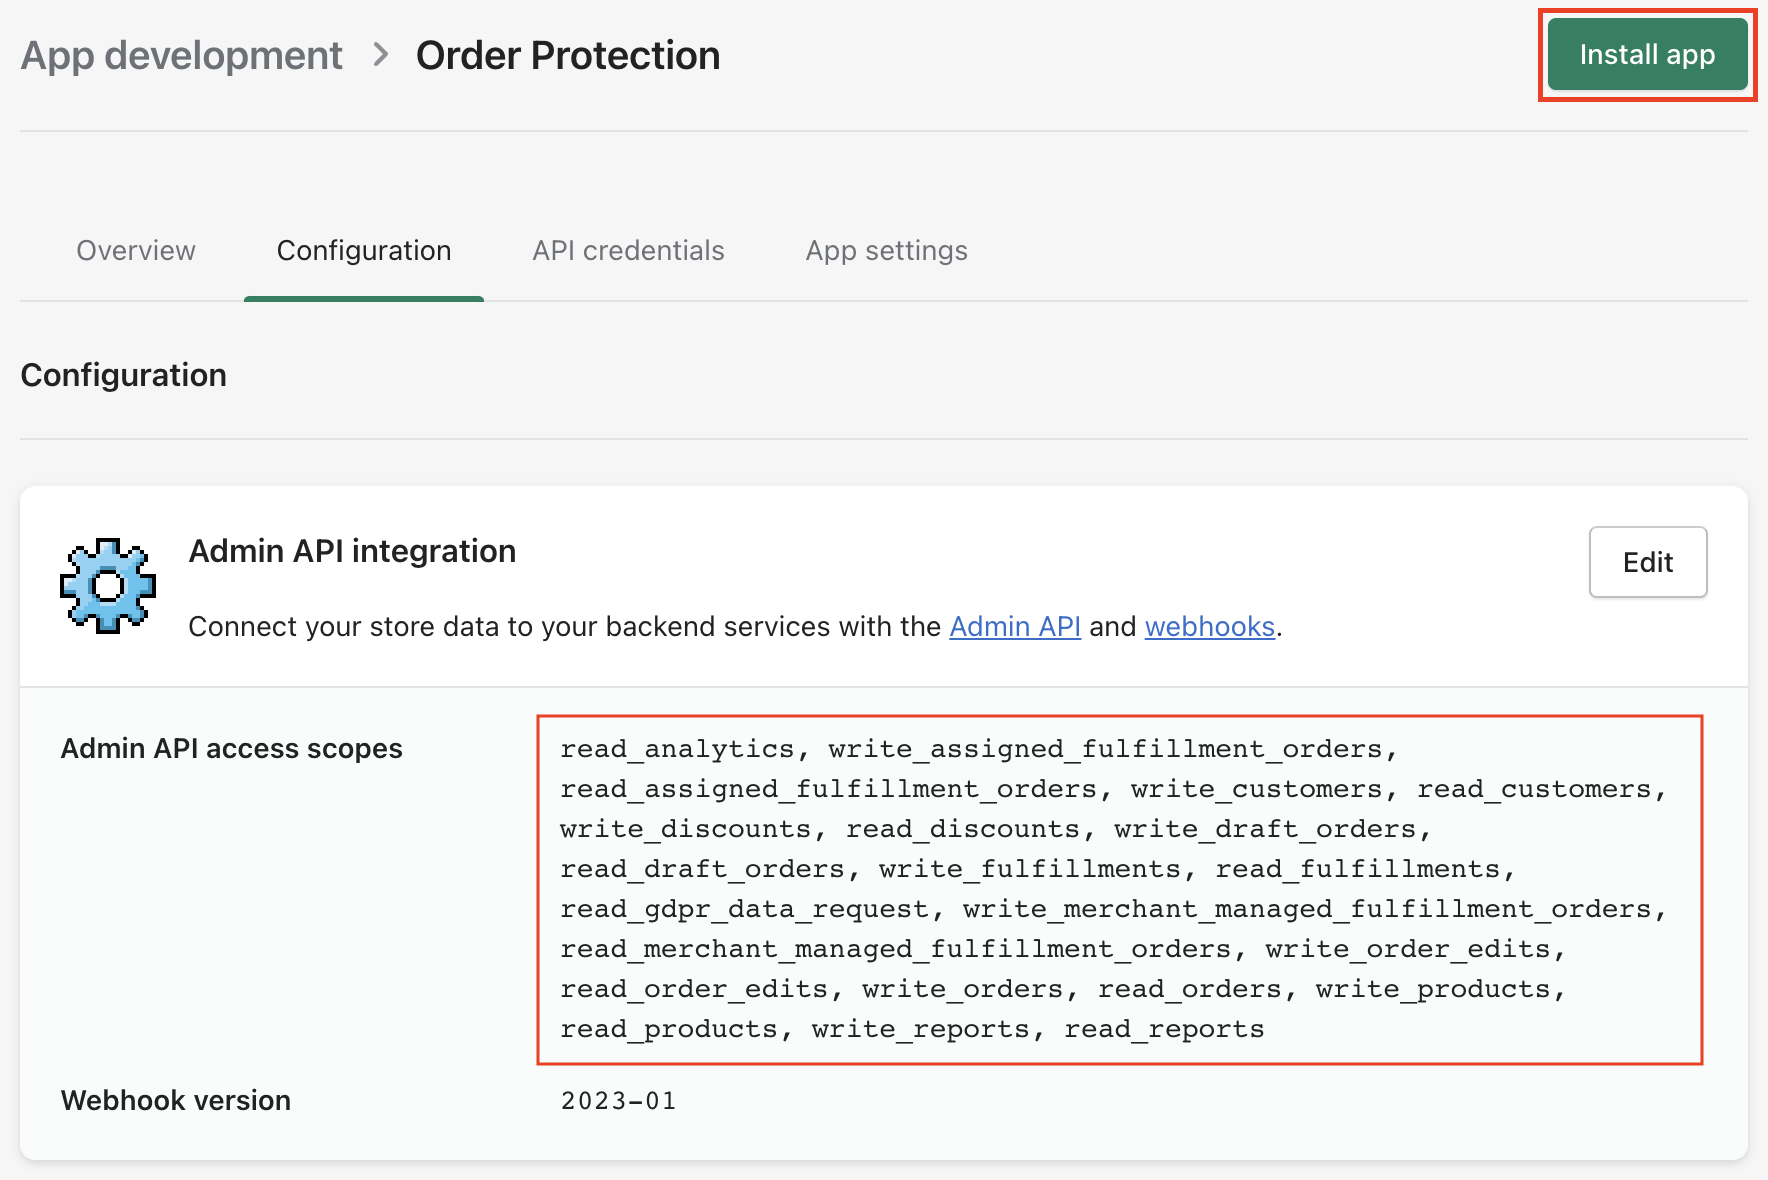
In the modal window, click Install.
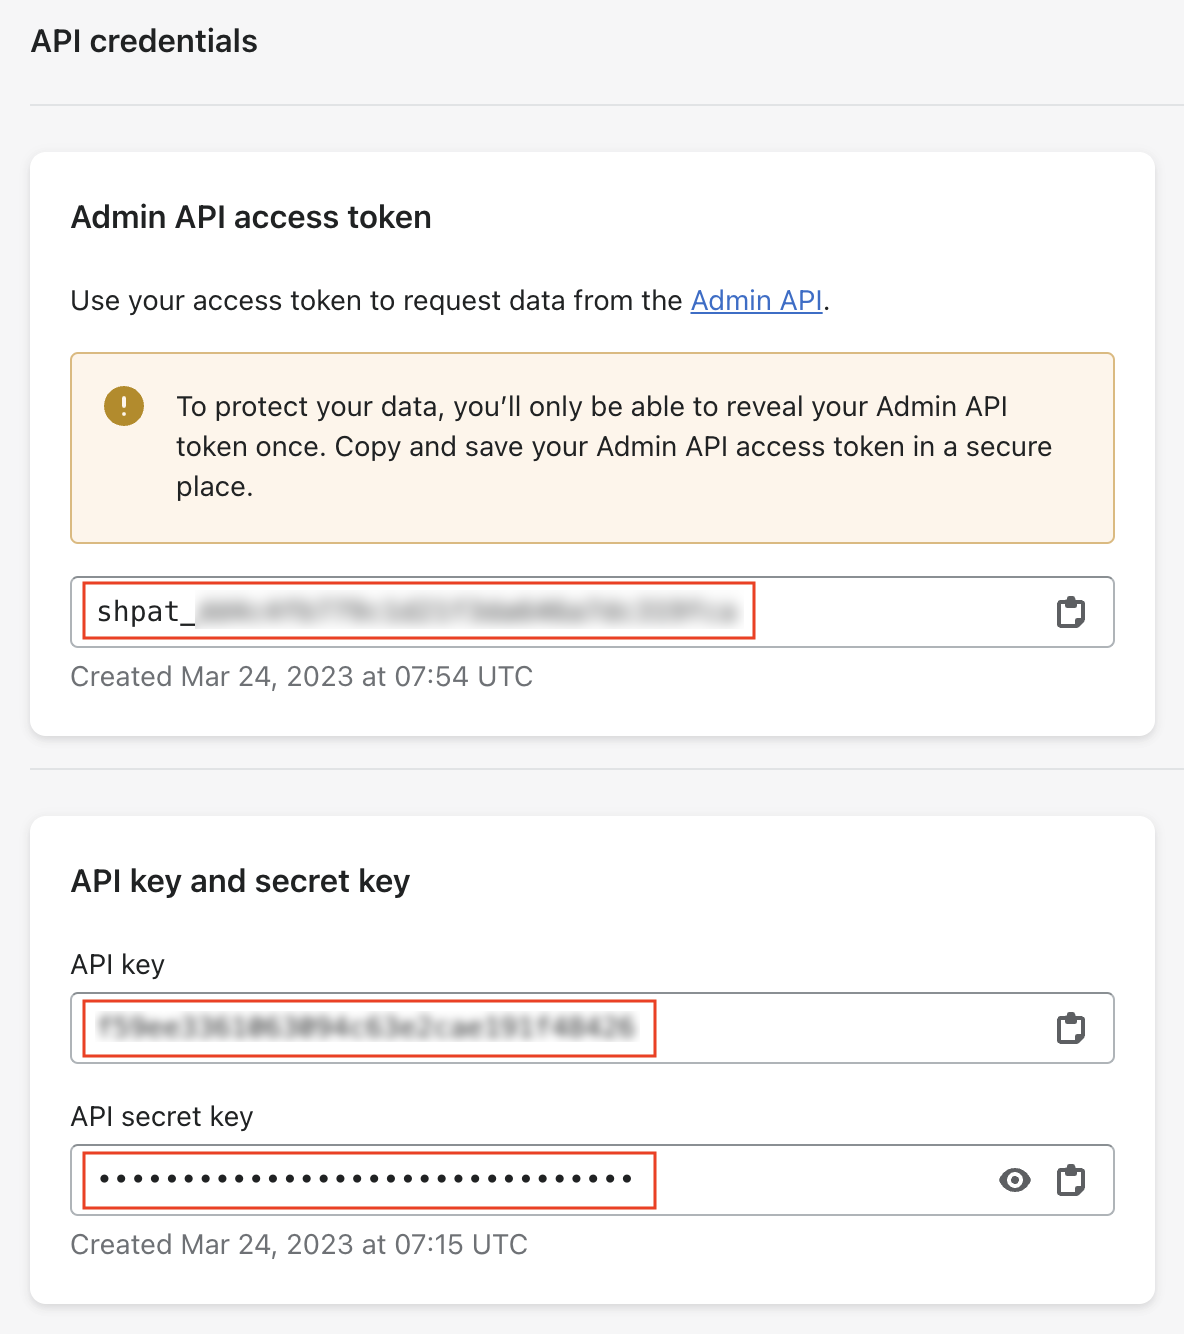
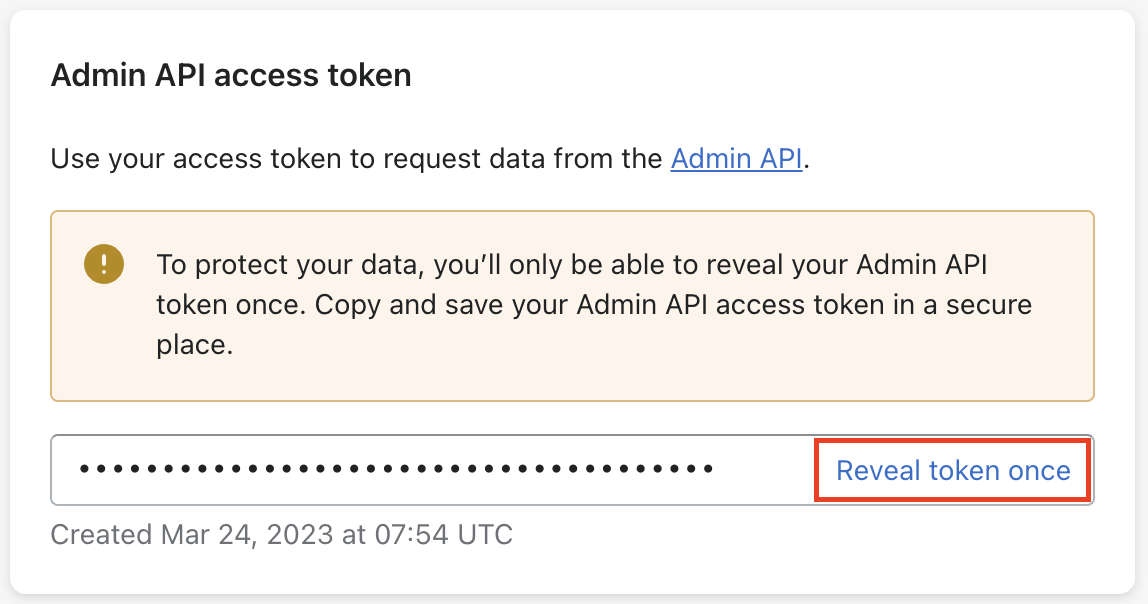
In the Admin API access token section, click Reveal token once.
Caution You can see the Admin API access token on this page only one time, because the token provides API access to sensitive store data. After revealing the access token, copy the token and paste it somewhere secure so that you can refer to it again. Treat the token like a password. After revealing the full access token once, this page displays only the last 4 digits of the access token for reference.
Copy values for
Admin API access token,API key, andAPI secret keyand send them to your account manager so they can finish onboarding your store.